Laser chiller high temperature alarms can interrupt production within minutes. A rising coolant temperature may distort cutting accuracy, weaken laser output, or trigger an emergency shutdown. In 2026, modern chillers provide smarter diagnostics, yet basic cooling problems still require careful inspection.
This guide explains how to troubleshoot laser chiller high temperature alarms through practical, safe checks. It covers coolant level, flow rate, ambient temperature, filters, fans, pumps, sensors, and heat exchanger performance. A blocked filter may look harmless, but it can restrict circulation and leave the display climbing above 30°C. Dust on a condenser can create a similar warning, especially in workshops with poor ventilation.
Start with the machine manual and the alarm code. Do not reset the system repeatedly without finding the cause. That habit can hide a failing pump or damaged temperature sensor. Check the coolant temperature against an independent thermometer when possible. Inspect hoses for kinks, bubbles, leaks, or unusual vibration. Small details matter.
Some cases are not obvious. A chiller may report high temperature because the room is too warm, not because the laser is defective. Incorrect coolant, unstable power, or an undersized unit can also confuse diagnosis. Experience helps, but assumptions can still lead to wasted time. When readings remain abnormal, qualified service personnel should test electrical components and refrigerant systems. This guide supports informed maintenance, not risky repairs. Reliable records, clear measurements, and patient troubleshooting usually reveal the real problem.
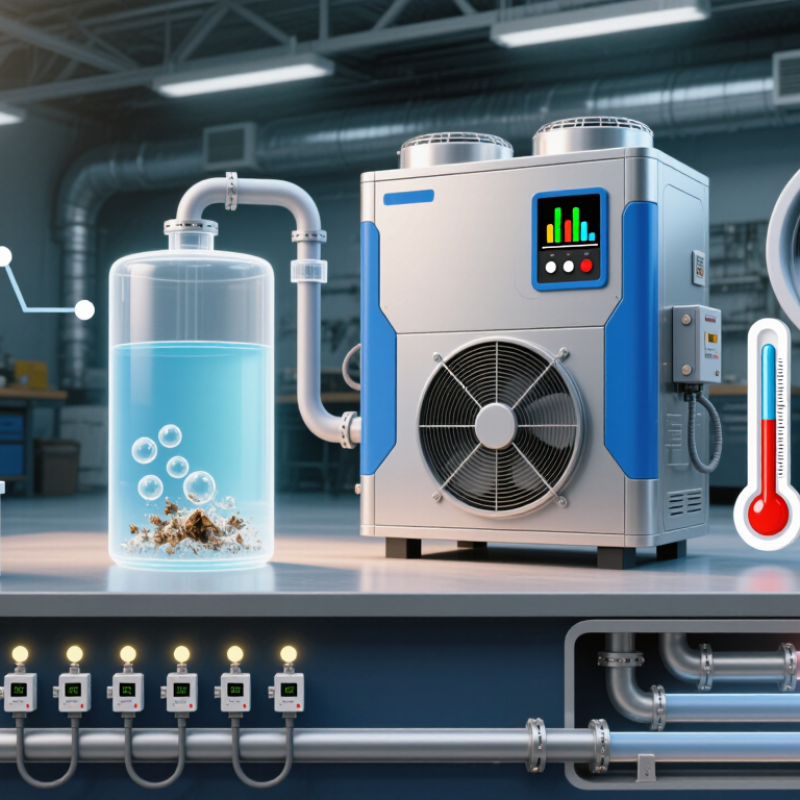
Identify the Cause of the Laser Chiller High Temperature Alarm
A high-temperature alarm usually signals restricted heat removal, not a failed controller. In field inspections, check the display, reservoir level, pump sound, and outlet temperature first. A dry or foamy reservoir can indicate leakage, trapped air, or insufficient circulation. A laser chiller should not be judged by alarm codes alone. Compare actual readings with the equipment’s rated flow and temperature range.
The U.S. Department of Energy’s Industrial Decarbonization Roadmap identifies industrial cooling as an important energy demand, while industry consumes about one-third of U.S. energy. Small cooling losses therefore deserve attention. ASHRAE Handbook—HVAC Systems and Equipment explains that fouling increases heat-transfer resistance and reduces exchanger performance. Inspect dusty condenser fins, blocked filters, scaled water circuits, and poor room ventilation. A warm room can quickly raise the condenser outlet temperature.
A reset is not a repair. If flow is normal, measure inlet and outlet temperatures across the heat exchanger. A small temperature difference may suggest weak heat transfer or excessive flow. A large difference may indicate restriction or low flow. I have seen maintenance teams replace sensors too early. That assumption can waste time. Verify the sensor against a calibrated thermometer, then inspect refrigerant pressure only through qualified service procedures. Record ambient temperature, coolant level, flow, and alarm timing before changing settings. This evidence makes the real cause easier to separate from a temporary symptom.
2026 Best How to Fix Laser Chiller High Temperature Alarms?
A high-temperature alarm often begins with a simple coolant problem. Check the reservoir while the system is cool. The level should match the equipment manual, not an improvised mark. Low coolant can pull air into the pump and reduce heat transfer. Inspect hoses for flattening, leaks, and sharp bends. Then clean the inlet strainer carefully. A blocked strainer may leave the pump running, but the laser receives insufficient flow.
Measure the actual flow rate, not only the pump sound. The U.S. Department of Energy’s Pumping System Sourcebook explains that flow changes with pump speed, while power changes approximately with the cube of speed. A weak pump, closed valve, or trapped air pocket can therefore create unstable cooling. Water quality deserves equal attention. ISO 3696:1987 defines Grade 2 laboratory water at conductivity below 0.1 mS/m at 25°C. However, laser cooling loops may require different conductivity, resistivity, or inhibitor limits. Follow the system specification. Very pure water can still attack unsuitable metals. This is an easy detail to miss.
Tips: Record coolant level, inlet temperature, outlet temperature, flow, and conductivity during normal operation. Compare future alarms with this baseline. Do not add chemicals casually. Flush contaminated coolant only after confirming compatibility. If the alarm remains, inspect the temperature sensor and heat exchanger, because the displayed value may be wrong. Recheck your assumptions. The first diagnosis is not always correct.
Check the coolant level first, then verify the circulation flow rate and water quality. Typical systems should maintain a coolant level of at least 80%, adequate flow above the equipment-specific minimum, and clean low-conductivity water. The values shown are common diagnostic reference points; always confirm the exact limits in the chiller and laser equipment manuals.
A laser chiller high-temperature alarm often begins with restricted airflow. Check the intake filter first. A gray filter can look acceptable while blocking cooling air. The U.S. Department of Energy’s Operations and Maintenance Best Practices Guide reports that effective maintenance may reduce facility energy use by 5–20%. That range is not a promise for every chiller, but it shows why small maintenance tasks matter.
Inspect the fan while the unit is running safely. Listen for rattling, slow rotation, or repeated stopping. Dust on the blades can reduce airflow and raise condenser temperature. Clean the condenser coil with the approved method. Bent fins need careful straightening, not aggressive brushing. ASHRAE’s HVAC Systems and Equipment guidance identifies airflow and heat-rejection conditions as key factors in cooling performance. Do not ignore a partially blocked coil.
Ventilation deserves a physical check. Leave adequate clearance around exhaust openings, and confirm that hot air is not recirculating into the intake. Measure room temperature near the chiller, not beside a doorway. In practice, technicians sometimes replace a sensor before checking the ventilation path. That is an expensive guess. Record ambient temperature, filter condition, fan behavior, condenser cleanliness, and alarm timing. One imperfect detail matters: a clean filter cannot compensate for a cramped, overheated room. If the alarm returns after cleaning and airflow correction, qualified service personnel should test refrigerant conditions, pumps, sensors, and control settings.
2026 Best How to Fix Laser Chiller High Temperature Alarms?
Verify Temperature Settings, Sensors, and Electrical Connections
A high temperature alarm does not always mean the chiller is overheating. Check the setpoint, alarm limit, and displayed temperature against the laser system’s requirements. A setting that is too low can trigger repeated warnings during normal operation. Record the actual outlet temperature with a calibrated thermometer. Small differences matter.
Inspect the temperature sensors next. Look for loose plugs, damaged cables, moisture, or dust around the sensing point. Compare the controller reading with an independent measurement after the chiller runs for several minutes. If readings change suddenly, the sensor or its connection may be unstable. I have seen technicians replace sensors too quickly. The real fault was often a partially inserted connector.
Electrical connections deserve careful attention. Switch off power according to the equipment service procedure before opening any panel. Check terminal tightness, supply voltage, fuses, and signs of heat discoloration. A weak connection can create extra heat and cause intermittent alarms. Do not reset the alarm repeatedly without finding the cause. That approach may hide a developing failure. Also check whether nearby equipment shares an overloaded circuit. I would recheck every measurement, because one incorrect meter setting can lead to a confident but wrong repair.
| Inspection Area | Reference Condition | Typical High-Temperature Symptom | Verification Method | Corrective Action | Priority |
|---|---|---|---|---|---|
| Coolant setpoint | Use the temperature specified for the laser system; many industrial cooling loops operate near 20–25 °C. | The displayed coolant temperature is already close to the alarm limit after startup. | Compare the controller setpoint, actual temperature, and alarm threshold with the equipment manual. | Restore the approved setpoint. Do not lower the alarm limit simply to suppress the warning. | High |
| Ambient temperature | Keep the room within the chiller’s specified operating range; many units are designed for approximately 5–40 °C ambient air. | The alarm appears during hot afternoons or when the enclosure is closed. | Measure air temperature near the chiller air inlet, not only at the room thermostat. | Improve room ventilation or air conditioning and keep hot exhaust air away from the inlet. | High |
| Air filter and condenser | Air passages should be clean, unobstructed, and able to discharge heat freely. | The fan runs continuously, airflow is weak, or the coolant temperature rises slowly under normal load. | Inspect the filter, condenser fins, fan guard, and clearance around the chiller. Look for dust mats or blocked fins. | Clean using the manufacturer-approved method, replace a blocked filter, and maintain clear air space. | High |
| Coolant level | The reservoir should remain between the marked minimum and maximum levels when the system is cool. | Temperature fluctuates, bubbles are visible, or the pump sounds unusually loud. | Check the level after shutdown and cooling. Inspect tubing, fittings, and the laser loop for leakage. | Add only the specified coolant mixture, repair leaks, and bleed trapped air according to the service procedure. | High |
| Coolant flow | Flow must meet the laser and chiller specifications; the exact minimum value is model-dependent. | High temperature occurs together with a flow alarm, low-flow indication, or pump noise. | Read the flow display or measure flow with an approved instrument. Check kinked hoses, closed valves, and clogged filters. | Open the correct valves, remove restrictions, clean the water circuit, or service the pump if flow remains low. | Critical |
| Temperature sensor | The sensor reading should be stable and reasonably consistent with an independent calibrated thermometer. | The display jumps suddenly, shows an implausible value, or reports high temperature when the coolant is visibly cool. | Compare the displayed value with a calibrated probe and inspect the sensor connector for moisture, looseness, or corrosion. | Reseat the connector, repair damaged wiring, or replace the sensor with the specified type and range. | High |
| Temperature sensor wiring | Signal wires should be continuous, properly secured, and routed away from high-current or high-frequency cables where required. | The temperature value changes when the cable or connector is moved. | With power isolated, perform a continuity and visual inspection using the wiring diagram; do not short sensor terminals. | Repair terminals or replace the cable assembly. Use shielding and grounding practices specified by the equipment documentation. | High |
| Pump operation | The pump should start correctly, maintain specified flow, and operate without grinding, cavitation, or repeated cycling. | The chiller overheats even though the condenser is clean and the coolant level is correct. | Listen for abnormal noise and confirm pump current, flow, and inlet/outlet pressure if test points are provided. | Remove air or restrictions. If performance remains below specification, have the pump inspected or replaced. | Critical |
| Input voltage | Supply voltage must match the nameplate and remain within the permitted tolerance, commonly about ±10% unless otherwise specified. | The compressor or pump stops, restarts, or runs with reduced performance. | A qualified person should measure voltage at the chiller input under load and compare it with the nameplate rating. | Correct the supply circuit, connector, or protection device. Do not change wiring configuration without authorization. | Critical |
| Electrical terminals and grounding | Terminals should be tight, dry, free from discoloration, and connected to a verified protective earth. | Intermittent alarms, overheated terminals, buzzing contactors, or unexplained controller resets. | After lockout, inspect terminals and grounding. Check for heat damage and verify protective-earth continuity using approved procedures. | Repair loose or damaged connections and test the grounding system before returning the chiller to service. | Critical |
| Compressor and refrigeration circuit | The compressor should cycle normally and the unit should achieve the specified coolant temperature under its rated heat load. | The compressor runs continuously without reducing coolant temperature, or protective trips occur. | Check fan operation, refrigerant-service indicators, compressor current, and fault history through authorized service procedures. | Stop operation if overheating persists and arrange qualified refrigeration service. Do not release refrigerant. | Critical |
| Laser heat load | The chiller’s cooling capacity must exceed the actual heat load with the required operating margin. | The alarm appears only at high laser power, high duty cycle, or during a new process. | Record laser power, duty cycle, coolant temperature, flow, and ambient temperature during the event. | Reduce load only as a temporary diagnostic step and verify that the selected chiller capacity matches the process. | High |
| Hoses and water circuit | Hoses should be correctly connected, free of kinks, and not collapsed under vacuum or excessive bending. | Temperature rises after maintenance, relocation, or replacement of tubing. | Trace the complete supply and return paths and verify correct flow direction and fittings. | Correct hose routing, remove kinks, tighten approved fittings, and purge air from the circuit. | High |
| Alarm reset and trend review | A reset should be performed only after the cause has been identified and the temperature has returned to a safe range. | The alarm clears temporarily but returns repeatedly. | Review alarm history and trend data for startup time, peak temperature, flow changes, and power interruptions. | Document the findings, correct the underlying fault, and test the chiller under normal operating load before release. | High |
A laser chiller high-temperature alarm should be tested, not simply reset. Begin by recording the room temperature, chiller inlet temperature, outlet temperature, and alarm value. Compare these readings with the laser system’s specified cooling range. A small infrared thermometer can reveal whether the displayed temperature is believable.
Check the cooling path while the system is safely stopped. Inspect the air filter, condenser fins, fan operation, coolant level, and visible hoses. Dust can form a gray blanket over the fins. A weak pump may also produce normal-looking readings at first, then trigger an alarm during long cutting cycles.
Never bypass the alarm or open a pressurized circuit without proper training.
Preventive checks should follow operating hours, not guesswork. Clean the filter regularly, keep clearance around the vents, and use the correct coolant mixture. Record temperatures during startup and after extended operation. This history often exposes a gradual rise before a failure occurs.
I once treated a recurring alarm as a sensor problem, but restricted airflow was the real cause. That mistake was avoidable. Sensor calibration still matters, especially when readings remain unchanged under different loads.
Schedule professional inspection when the alarm returns after cleaning, coolant replacement, or stable-room testing. Even a quiet chiller can be losing performance.
It often signals restricted heat removal, not a failed controller. Check the display, coolant level, pump sound, and outlet temperature. Do not trust the alarm code alone.
Inspect the reservoir when the system is cool. Match the level with the equipment manual. A low level can pull air into the pump. Foam may suggest leakage, trapped air, or poor circulation.
Pump sound does not confirm sufficient flow. A blocked strainer, closed valve, sharp hose bend, or weak pump may reduce circulation. Measure the actual flow rate. Sound can mislead.
Contamination, scale, or unsuitable conductivity can reduce heat transfer. Follow the cooling system’s specified conductivity and inhibitor limits. Very pure water can still damage unsuitable metals. That detail is easy to miss.
Measure inlet and outlet temperatures across the heat exchanger. A large difference may indicate low flow or a restriction. A small difference may suggest weak heat transfer or excessive flow. Recheck the measurement before replacing parts.
Yes. Compare the setpoint and alarm limit with the laser system’s requirements. A setting that is too low can trigger warnings during normal operation. Measure the outlet temperature with a calibrated thermometer. Small differences matter.
Compare the displayed reading with an independent calibrated thermometer. Check for loose plugs, damaged cables, moisture, or dust. Sudden reading changes may indicate an unstable sensor connection. I would verify the connector first.
Follow the service procedure and switch off power before opening panels. Check terminal tightness, supply voltage, fuses, and heat discoloration. A weak connection can create extra heat and intermittent alarms. Do not guess.
No. A reset is not a repair. Record coolant level, temperatures, flow, conductivity, room temperature, and alarm timing. Then compare the readings with normal-operation data. My first diagnosis may be wrong.
This guide explains how to troubleshoot laser chiller high temperature alarms by starting with a clear diagnosis of the problem. First, check the coolant level, circulation flow, and water quality, since low fluid levels, restricted flow, or contamination can quickly reduce cooling performance. Next, inspect the filter, fan, condenser, and surrounding ventilation area for dust, blockages, or insufficient airflow. These components must remain clean and unobstructed to release heat effectively.
The guide also covers how to verify temperature settings, inspect sensors, and check electrical connections for loose or damaged components. After correcting any issues, test the chiller under normal operating conditions and monitor its temperature stability. Regular cleaning, coolant maintenance, proper ventilation, and routine inspections can help prevent repeated high temperature alarms, protect laser equipment, and maintain reliable cooling performance.
